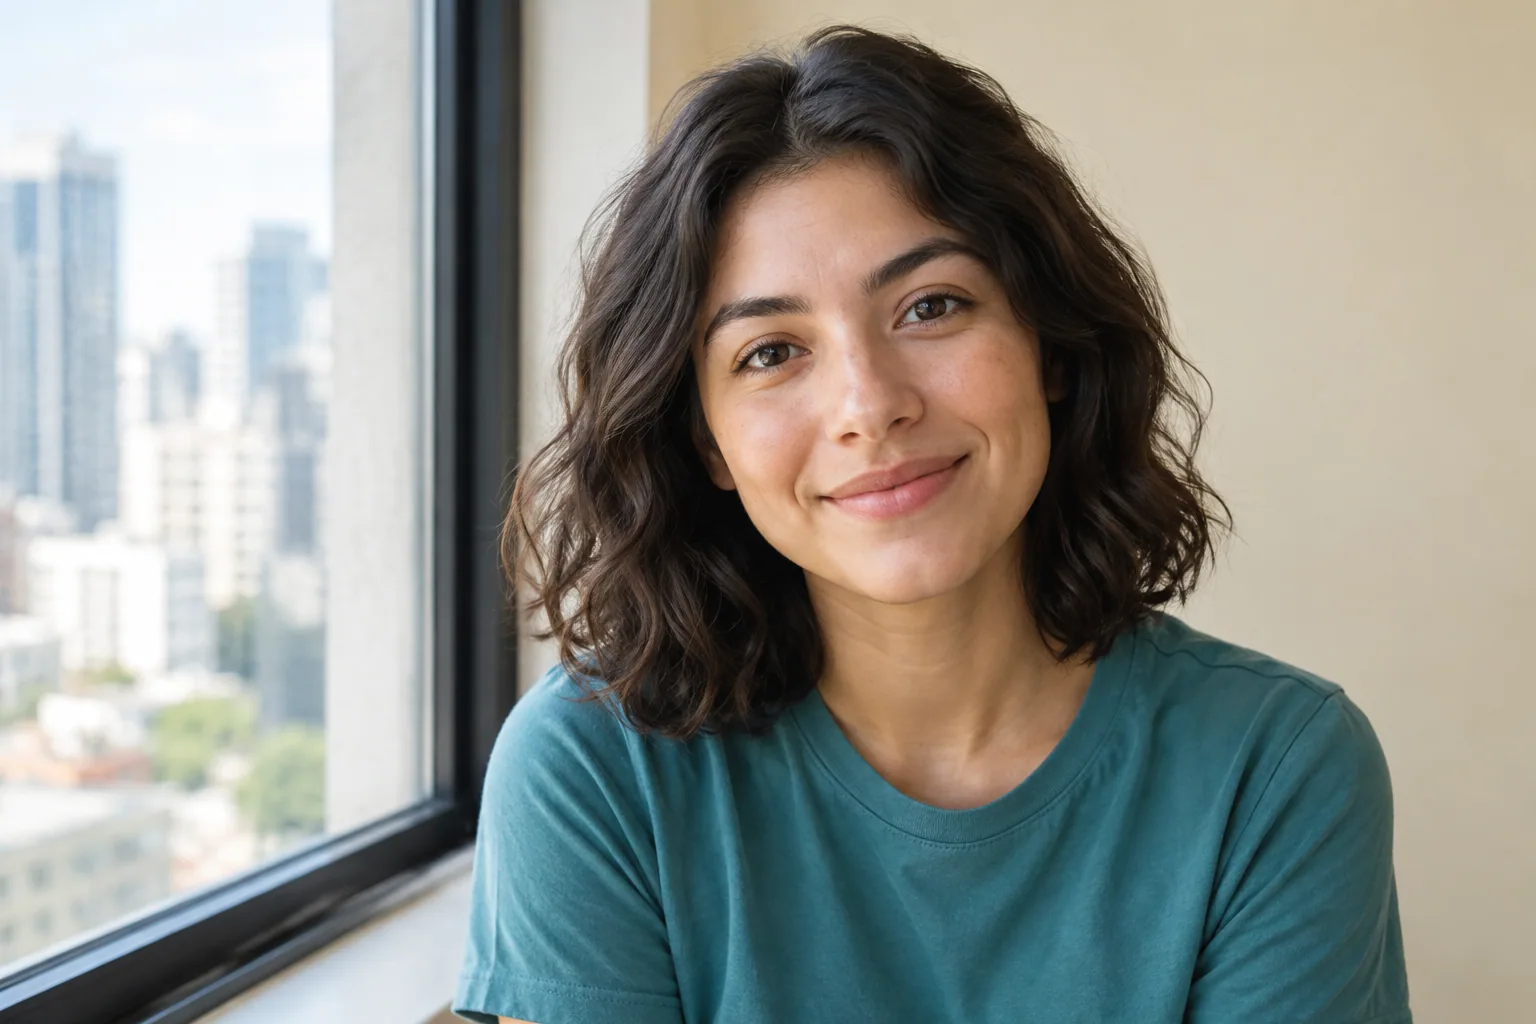
Try a window-lit close-up, a bright solid-color backdrop, or a head-and-shoulders portrait outdoors with soft greenery behind you. The strongest Instagram profile pictures keep your face easy to recognize, your eyes clear, and the background simple enough to read inside a small circle.
10 Instagram profile picture ideas to try
Start with the setting you can recreate most easily. All ten ideas work as phone portraits or as directions for an AI portrait made from your own selfies.
| Idea | Simple setup | Why it works at thumbnail size |
|---|---|---|
| Window-lit close-up | Face a window with a plain wall behind you | Even light keeps facial details clear |
| Bright solid-color backdrop | Stand in front of a colored wall or smooth fabric | One background color separates you from the scene |
| Outdoor greenery | Stand in open shade, away from foliage | Soft green shapes frame your face without competing |
| Golden-hour portrait | Find low, soft sunlight and a quiet background | Gentle warmth adds character without needing props |
| Casual coffee-shop portrait | Sit near a window with the room behind you | A close crop keeps the everyday setting secondary |
| Clean studio-style headshot | Use a plain wall and soft front light | A simple composition stays readable when reduced |
| Subtle film-inspired portrait | Start with a clear daylight portrait | Restrained color treatment adds style without hiding you |
| Black-and-white portrait | Use soft light and contrasting clothing | Light and dark tones define your face |
| Close portrait with a hobby detail | Keep one recognizable item beside your shoulder | A small visual clue adds context while your face leads |
| Colorful wall portrait | Choose one broad section of a painted wall | A bold color gives the portrait a consistent visual identity |
1. Window-lit close-up: face the light, not the room
Frame your head and shoulders, leaving space above your hair. Face a window, lower your shoulders, and look into the lens with a relaxed smile or neutral expression.
Avoid: standing with the window behind you. Turn around so daylight falls on your face; if direct sun creates hard patches, move out of the beam or use a sheer curtain.
2. Bright solid-color backdrop: choose contrast with your hair and shirt
Use a blue wall, a pink backdrop, or another single color you enjoy. Stand a step away from it, face soft daylight, and keep your shoulders slightly angled while your face stays toward the camera.
Avoid: matching your shirt and background so closely that your shoulders disappear. Check the image small before committing to the color combination.
3. Outdoor greenery: put distance between you and the leaves
Find open shade and stand several steps in front of a hedge or trees. Crop to your upper chest, keep your eyes toward the camera, and try a small smile.
Avoid: branches appearing to grow out of your head. Shift sideways until the area directly behind your hair is relatively even; use portrait mode only if it preserves clean hair edges.
4. Golden-hour portrait: keep the sun comfortable for your eyes
Use low sunlight when it feels soft rather than harsh. Frame your head and shoulders, turn slightly until your face is evenly lit, and look toward the lens without forcing a smile.
Avoid: squinting straight into the sun or leaving your face dark against a bright sky. If either happens, move into nearby open shade and keep the warm background.
5. Casual coffee-shop portrait: let the setting stay secondary
Sit near a window with your face turned toward the light. Ask a friend to photograph you at eye level, framing from the upper chest up, with a relaxed expression and the room behind you.
Avoid: holding a cup in front of your mouth or filling the crop with the table. A cup near the bottom edge is enough, and it can disappear from the final crop without weakening the portrait.
6. Clean studio-style headshot: use a wall instead of a studio
Choose a plain wall and soft front-facing daylight. Wear a simple neckline, frame your head and shoulders, and turn your shoulders slightly while keeping your face toward the lens.
Avoid: standing directly under an overhead light that leaves your eyes in shadow. Move toward softer front light; you do not need a formal outfit or studio equipment.
7. Subtle film-inspired portrait: start with a sharp original
Take a face-forward portrait in soft daylight against a cream wall or quiet outdoor background. Use a relaxed expression, then try a restrained warm or faded color treatment.
Avoid: heavy grain, washed-out eyes, or color shifts that make your skin look unlike it does in person. Reduce the effect until facial details remain clear at thumbnail size.
8. Black-and-white portrait: separate light and dark areas
Use window light, a head-and-shoulders crop, and a calm expression. A dark shirt against a light wall, or the reverse, gives you a useful starting point before converting the image to black and white.
Avoid: pushing contrast until your eyes disappear into shadow. Compare the color version too; black and white is an option, not an automatic improvement.
9. Hobby-detail portrait: keep the activity beside your face
Place one recognizable detail near your shoulder, such as a guitar neck or a camera held below your chin. Use soft front light, keep your face toward the lens, and crop closely enough that your expression remains the main subject.
Avoid: relying on tiny objects or lettering to explain your hobby. If the detail becomes unreadable in the circle, let your bio explain it instead.
10. Colorful wall portrait: use one section, not the whole mural
Choose a broad area of color rather than a detailed scene. Stand in shade, frame your head and shoulders, and angle your shoulders slightly while looking at the camera.
Avoid: bright lines crossing your eyes or cutting through your hair. Move a few steps until the wall acts as a background rather than the main attraction.
Choose an idea that fits your account
Pick the impression you want your photo to support, then choose the simplest version of it.
| Account type | Good starting ideas | What to prioritize |
|---|---|---|
| Personal account | Window light, greenery, coffee shop | A current appearance your friends recognize |
| Creator account | Solid color, colorful wall, subtle film treatment | A repeatable color or visual style |
| Public-facing professional account | Studio-style headshot, window light, restrained black and white | Clear eyes, simple clothing, an uncluttered crop |
Your outfit and background can echo your content without recreating an entire scene. Try one of these pairings:
- Everyday personal account: a navy T-shirt against a cream wall, with window light on your face.
- Food or lifestyle creator: a rust-colored top against a pale café wall, with no menu boards in the crop.
- Professional account: a blue button-down or plain knit top against a light gray wall.
For a relaxed direction, browse these casual portrait styles. Matching your feed can make the account feel consistent, but it should not come at the expense of looking like yourself.
If you decide you would rather keep your face off your account, use this separate guide to profile picture ideas without showing your face.
Make the portrait work inside a small circle
Instagram displays your profile picture in a circle, so the corners of your square image will not remain visible. Start with a square crop, then preview a circle over it before choosing the final framing.
This schematic shows the layout to aim for, not a required face-size measurement:
Square portrait with circular overlay     Small-circle preview
┌─────────────────────┐
│.─────.       │.─────.
│.´         `.    │                        /  hair \
│   /    hair     \   │                       |  •  •  |
│  │     •  •      │  │                       |   ◡    |
│  │      ◡        │  │                        \_____/
│   \    chin     /   │
│    `.shoulders.´    │
│       `─────´       │
└─────────────────────┘
Keep your face prominent, with breathing room above your hairstyle and beneath your chin. Place your eyes around the upper-middle area, then adjust by looking at the actual preview rather than chasing an exact percentage.
Compare these example crops:
- Too wide: your waist and the surrounding room are visible, but your expression is hard to read. Crop inward to your upper chest.
- Too tight: your hair touches the circle and your chin nearly clips the bottom. Widen the crop slightly.
- Useful starting point: your head and shoulders are visible, both eyes are clear, and the circle leaves room around your head.
Full-body photos usually leave too little space for facial detail. Tiny props and text become hard to read, while busy backgrounds compete with your face. If the portrait only works when enlarged, choose a simpler crop.
Take a usable profile photo with your phone
Use this short sequence for whichever idea you picked:
- Clean the lens. Wipe away fingerprints before taking your first shot.
- Find soft light. Face a window indoors or use open shade outdoors. Without a useful window, try a broad, diffused lamp in front of you rather than relying only on an overhead fixture.
- Simplify the background. Move laundry, bags, or distracting objects out of view. Check directly behind your head.
- Place the camera around eye level. Use the regular camera view as your starting point. Avoid an ultra-wide lens for a close portrait.
- Stabilize the phone. Use a stand or secure shelf and turn on the timer. The rear camera is usually sharper than the front camera, and a timer or helper makes it easier to use, as described in Arizona State University’s self-photography guide.
- Step back, then crop. Rather than holding the phone inches from your face, move it farther away and crop the resulting image. This can reduce exaggerated close-range proportions; avoid pinching to digitally zoom in.
- Take six variations. Try shoulders straight and slightly turned, each with a neutral expression, a small smile, and a fuller smile. Keep your face toward the lens throughout.
Use regular photo mode if the background is already simple. Try portrait mode for greenery or a café, but inspect your hair, glasses, and ears for artificial blur before keeping it.
Try a different portrait setting with your own selfies
AI is an optional route if you have usable selfies but lack the wall, wardrobe, or setting you want. Selfie AI lets you upload a few of your own selfies, create a personalized model, and explore portrait styles.
Before uploading, follow this guide to choosing clear input selfies with suitable lighting and angles. Use photos that clearly show your current appearance rather than heavily filtered versions.
Premium users can describe custom portrait scenarios with text prompts. These two examples keep the focus on one person and a readable profile crop:
Window-lit casual portrait
A single subject using my likeness, head-and-shoulders framing, face toward the camera, clear facial details, relaxed small smile, plain navy T-shirt, soft daylight from a window in front, uncluttered cream wall background, room above the hair and below the chin for a circular crop.
Solid-color studio portrait
A single subject using my likeness, head-and-shoulders framing, shoulders slightly angled and face toward the camera, clear eyes and natural-looking facial details, simple white crewneck shirt, soft even studio-style lighting, solid muted blue background, no props or text, space around the head for a circular crop.
Treat prompts as directions, not guarantees. Review the likeness before choosing a result, and reject portraits that look polished but do not look like you. Once you have picked a direction, the AI profile picture maker is a practical next step for creating a portrait from your own selfies.
Pick the strongest photo before uploading
Compare two or three options at thumbnail size, not just as full-screen images. Put small versions beside each other or check each in the profile-photo preview before saving.
Use this checklist:
- Recognizable likeness: does it match how you look now?
- Clear eyes: can you see both eyes without glare, blur, or heavy shadow?
- Natural-looking details: do your facial features remain familiar without strong reshaping or filters?
- Background separation: can you distinguish your hair and shoulders from what is behind them?
- Clean circular crop: are your chin and hairstyle safely inside the edge?
For AI portraits, also inspect hair edges, glasses, earrings, and facial consistency. Reject distorted frames, mismatched jewelry, or altered features rather than hoping they will disappear in the small crop.
Save the uncropped original separately so you can reuse it in a different layout. Then upload the version that makes your face easiest to recognize, even if another option looks more dramatic at full size.
FAQ
How often should I change my Instagram profile picture?
There is no useful fixed schedule. Change it when your appearance has noticeably changed, your account has a different purpose, or the current photo is unclear. If people still recognize you easily, you do not need to replace it just to keep it fresh.
Should I use the same profile picture on Instagram and other social accounts?
Using the same portrait can help people recognize you across accounts, especially if you use the same name. Separate personal and professional accounts can use different photos while keeping your appearance consistent. Preview your chosen photo in each app’s crop before saving it.